If you’ve ever tried stepping holes on a drill press and ended up with wobbly edges, misaligned steps, or even a broken drill bit, you’re not alone. As a drill press supplier with 12 years of working with metal fabricators, woodworkers, DIY hobbyists, and small construction teams, I’ve seen every mistake that comes with step drilling—from rushing through setup to grabbing the wrong bit for the job. Step drilling, when done right, is one of the most efficient ways to create tapered or multi-diameter holes for things like cable grommets, pipe fittings, or bolt clearance in a single pass. When done wrong? It’s a time-consuming mess that wastes material and breaks tools. This post isn’t just about “how to use a drill press for step drilling”—it’s about the practical, field-tested tricks I’ve learned from walking customers through 1000+ projects, paired with the technical basics that make the process safe and effective. Drill Presses
First, let’s get clear on what step drilling actually is. Unlike drilling a single consistent-diameter hole, step drilling involves creating a series of concentric, graduated holes that get wider as you go. For example, if you’re mounting a ½-inch pipe and a ¾-inch hose through a sheet of steel, you might first drill a small pilot hole, then a medium-sized hole, then the final wide hole in one sequence. The biggest mistake new drillers make here is treating step drilling like regular drilling—same speed, same pressure, same inattention to setup. But the drill press is the only power tool that makes step drilling reliable, because it keeps your bit perfectly aligned, prevents wandering, and gives you the control to adjust depth precisely. A hand drill might work for tiny, soft material step holes, but for any project that matters—think electrical panels, cabinet hardware, or structural metal brackets—the drill press is non-negotiable.
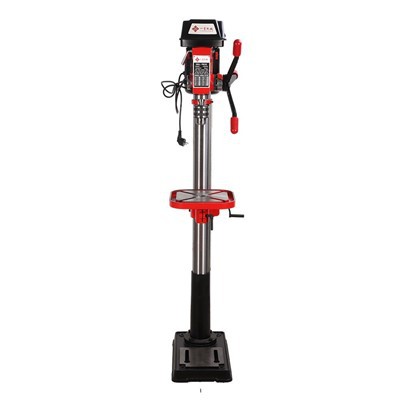
Before you even turn the drill press on, you need to prep your workspace and your machine. I can’t tell you how many times I’ve watched a customer start a step drill job with a wobbly workbench or a drill press that hasn’t been leveled in six months. First, clear your drill press table of any debris—even a small shard of metal or wood can throw your bit off-center mid-step. Next, check that your table is perfectly level. Most drill presses have a bubble level built into the table, or you can use a carpenter’s level across the X and Y axes. If it’s off, loosen the table lock, adjust the legs or the table itself, and re-tighten. A level table is the foundation of every clean step hole. Then, make sure your drill press is in good working order: check the chuck for any play (if you can wiggle the bit side to side when it’s tight, replace the chuck or get it serviced), inspect the belt for fraying, and confirm that the depth stop works properly. The depth stop is arguably the most important part of the machine for step drilling—without it, you’ll either drill too shallow and leave burrs, or too deep and punch through the other side of your material in a messy tear-out.
Next, choosing the right bit is half the battle. Step drill bits come in two main types: high-speed steel (HSS) for soft materials like wood, aluminum, and thin steel, and cobalt steel for hard materials like stainless steel, cast iron, or thick metal plate. HSS bits are cheaper and work great for ¼-inch to ½-inch steel, but they’ll dull quickly on ¼-inch plate. If you’re drilling steps in stainless, go with a M35 cobalt step bit—it’s made to withstand higher heat and last 10x longer than HSS. Another thing to check: the number of steps and the size of each step. For example, if you need a ⅜-inch pilot hole and a ⅝-inch final hole, don’t buy a bit that skips from ¼-inch to ⅝-inch—small, gradual steps are better for material integrity. Gradual steps reduce the amount of material you’re removing at once, which lowers the chance of the bit wandering or breaking. I always tell customers: if you’re working with material thicker than ¼-inch, add an extra step between your pilot hole and final hole. It’s a tiny extra pass that pays off in fewer broken bits and cleaner edges.
Once you’ve got your machine prepped and your bit selected, the next step is securing your workpiece. Clamping is non-negotiable here—no exceptions. I’ve seen dozens of custom steel brackets ruined because a piece of ½-inch aluminum shifted mid-step, leaving you with a hole that’s not concentric. First, mark your hole center with a punch and a small pilot drill. Don’t just use a pencil mark—center punch it firmly with a ball-peen hammer, then drill a ⅛-inch pilot hole to guide your step bit. This prevents the bit from wandering when you start the first step, which is a super common mistake. Then, clamp your workpiece to the drill press table. Use two clamps for small pieces, three for larger ones, and make sure the clamps are positioned so they don’t interfere with the drill path. If you’re drilling through thin material like sheet metal, add a backup piece of scrap wood or aluminum under the workpiece to prevent tear-out on the back side. Tear-out is when the material rips away from the hole’s edge as the bit exits, and a scrap backup is the cheapest and easiest way to stop it.
Now, let’s get to the actual step drilling process. The two biggest variables here are drill speed and feed pressure, and getting these right is what separates a clean step hole from a messy one. Most new drillers pick a random speed and keep it there, but step drilling needs a speed that decreases as you move to wider steps. For reference, here are the speed guidelines I give all my customers, based on material: for softwood or thin aluminum (under ⅛-inch), set the drill press to 1500–2000 RPM. For ¼-inch steel, 1000–1200 RPM. For ½-inch stainless steel, 500–700 RPM. Why lower speed for harder materials? Because step drilling creates a lot of friction—faster speed means more heat, which dulls your bit and can even harden the material around the hole, making further steps harder.
Feed pressure is equally important. When starting the first small step, you want firm, steady pressure—enough to keep the bit cutting, but not so much that you force it. As you move to wider steps, ease up on the pressure slightly. The wider the step, the more material you’re removing, so too much pressure here can cause the bit to grab the workpiece and twist it (hence the need for clamping!). The depth stop is your friend here—set it for each step before you start drilling that portion. For example, if your workpiece is ⅜-inch thick, set the depth stop so that the first ⅜-inch (your pilot step) drills all the way through, then adjust the stop to ⅝-inch for the next wider step. I always recommend drilling each step completely before moving to the next—don’t try to drill all steps at once in one pass. That’s a surefire way to break a bit, because the wider steps require more torque than the smaller ones.
Wait, what about lubrication? A lot of hobbyists skip this, especially when drilling wood, but lubrication is critical for metal step drilling. When you’re working with steel, stainless, or even thick aluminum, a little lubricant reduces friction, lowers heat, and gives you a cleaner hole. You can use specialty cutting oil, or even a household lubricant like WD-40 or vegetable oil in a pinch. I tell customers to apply a small drop of oil to the bit before each step—just enough to coat the cutting edges. Don’t overdo it, though—too much oil can make the bit slip and cause it to wander. For wood, lubrication isn’t necessary, but you can slow the speed a little to prevent burning the wood around the hole.
Let’s walk through a real-world example to make this concrete. Say you’re a cabinet maker mounting a 1-inch diameter pipe through a ½-inch thick oak cabinet side. Here’s how I’d walk you through the job: First, prep the drill press: level the table, check the chuck for play, set the depth stop range from 0 to ⅝-inch (since your pipe will be 1-inch, but you only need to drill through the ½-inch side, so you don’t have to go deeper than ⅝). Next, choose your bit: a 4-step HSS step bit, sized for ¼-inch, ½-inch, ⅞-inch, and 1-inch. That’s gradual, so you’re not removing too much material at once. Mark your hole center on the oak, center punch it, and drill a ⅛-inch pilot hole to guide the bit. Clamp the oak side to the drill press table, with a scrap piece of pine under it to prevent tear-out. Set the drill speed to 1500 RPM (appropriate for oak and the small steps). Now, start drilling the first ¼-inch step: apply a tiny drop of cutting oil (even olive oil works here), hold the feed pressure steady, and stop when the bit hits the depth stop. Next, adjust the depth stop to the next step (½-inch), apply a second drop of oil, and repeat the process. Then move to the ⅞-inch step, adjust the speed slightly down to 1200 RPM, and finally the 1-inch step. You’ll end up with a perfectly concentric 1-inch hole with no tear-out, no wobbly edges, and a bit that’s still sharp enough for your next job.
Now, what are the most common mistakes I see, and how to avoid them? First, skipping the pilot hole. I had a customer last month who drilled a 1-inch step hole in steel without a pilot, and the bit wandered ⅛-inch off-center—meaning his entire bracket had to be scrapped. The pilot hole takes 10 seconds and prevents that. Second, not clamping the workpiece. Another customer drilled a step hole in aluminum that shifted, and the hole was oval-shaped because he didn’t secure it. Clamping isn’t just for big pieces—it’s for every job. Third, using the wrong speed. I once watched a hobbyist drill a step hole in stainless at 2000 RPM, and the bit melted mid-step, leaving a mess of steel shavings. Lower speed is key for hard materials. Fourth, forcing the bit. If your drill press is struggling to cut a step, you’re either going too fast, using the wrong bit, or not lubricating. Forcing it will break the bit every time—let the bit do the work.
What about safety? It’s easy to get so focused on getting a clean hole that you forget the basics. Always wear safety glasses—metal shavings fly everywhere, and even a tiny one in your eye can be a big problem. Don’t wear loose clothing, gloves, or jewelry—they can get caught in the drill bit and pull you into the machine. Keep your hands at least 6 inches away from the bit while it’s spinning, and never reach under the drill press table while the machine is running. If the bit gets stuck, turn the drill press off immediately, unplug it, and then gently work the bit free. Never try to pull it out while the machine is running.
At the end of the day, step drilling with a drill press is a skill that gets easier with practice, but the right setup and techniques will make a huge difference from your first job. As a drill press supplier, my goal isn’t just to sell you a machine—it’s to help you use it well, so you get results that last. If you’re planning a step drilling project and need advice on the right bit, drill press settings, or techniques, reach out to our team to discuss your needs. We work with hobbyists, small businesses, and large contractors to match them with the right equipment and support for their projects. Don’t let bad setup or rushed steps ruin your next project—take the time to prep, choose the right tools, and follow these steps, and you’ll get clean, precise step holes every time.
Metal Lathe References:
- Oberg, E., Jones, F. D., Horton, H. L., & Ryffel, H. H. (2016). Machinery’s Handbook (31st ed.). Industrial Press Inc.
- Smid, P. (2008). CNC Programming Handbook (2nd ed.). Industrial Press Inc.
- Worktable, J. (2022). The Ultimate Guide to Drill Press Operations. Popular Woodworking Magazine.
- American National Standards Institute. (2019). Safety Standards for Power Tools: Drill Presses. ANSI B10.21-2019.
YS Machine Tools Co., Ltd.
We’re well-known as one of the leading drill presses suppliers in China, featured by quality products and good service. Please rest assured to buy customized drill presses at competitive price from our factory. Contact us for more details.
Address: 300 Sandusky st, Ohio, 43611, USA
E-mail: yishoumachinetools@gmail.com
WebSite: https://www.ysmachinetool.com/
